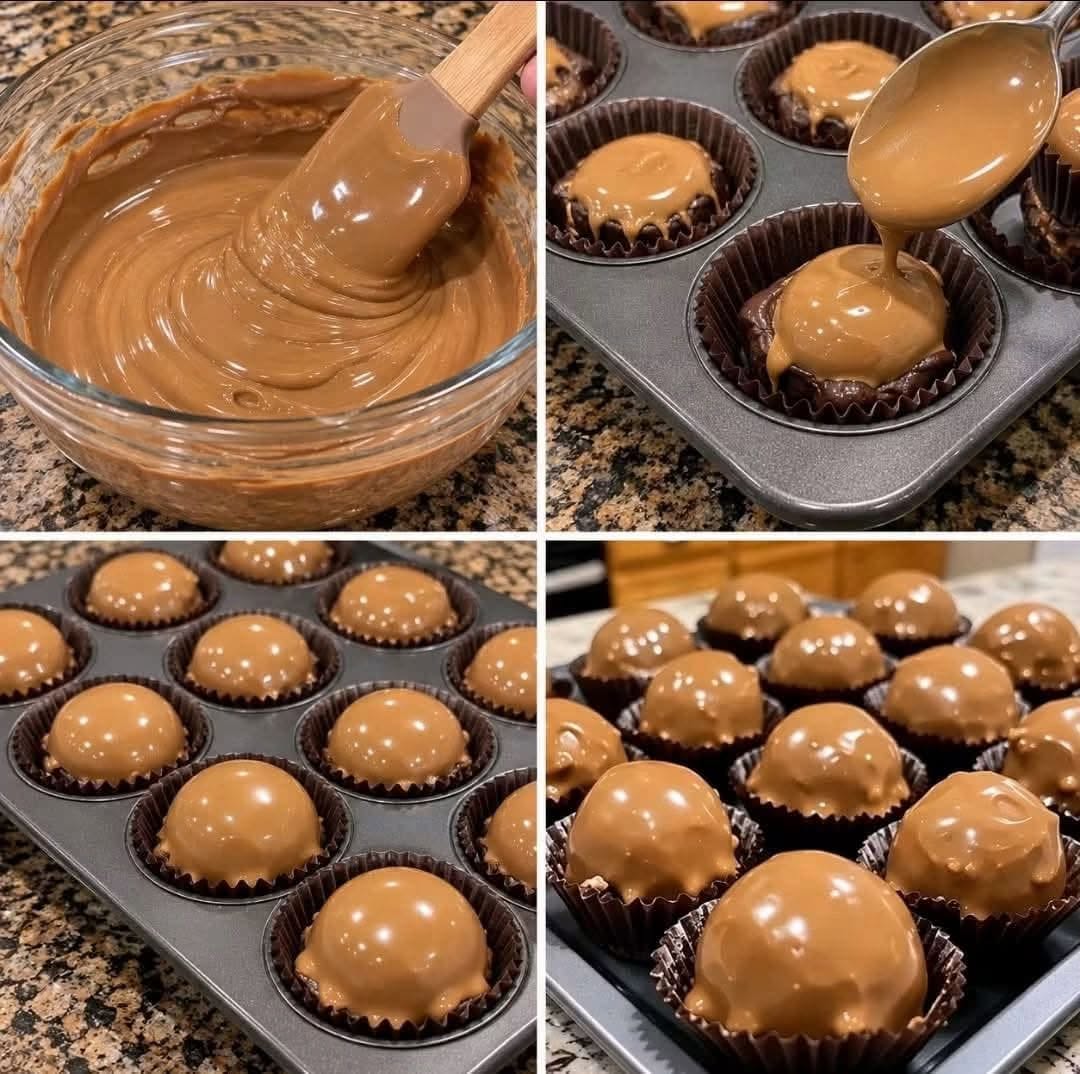
Easy Peanut Butter Cup Truffles – Your New Favorite No-Bake Treat!
If you love the combination of creamy peanut butter and rich chocolate, these Easy Peanut Butter Cup Truffles are about to become one of your favorite homemade treats! They’re sweet, smooth, chocolatey, and packed with that classic peanut butter cup flavor everyone loves.
The best part? You don’t need to turn on the oven. These no-bake peanut butter truffles are easy to prepare with simple ingredients and make a wonderful dessert when you’re short on time. Whether you’re planning a holiday party, preparing a homemade candy tray, or looking for a sweet weekend treat, this recipe is an easy choice.
I love no-bake desserts because they bring plenty of flavor without complicated baking steps. These little chocolate-covered bites look beautiful on a dessert platter, make thoughtful edible gifts, and are perfect for sharing with family and friends.
Why You’ll Love These Peanut Butter Cup Truffles
- No oven required: Simply mix, chill, dip, and enjoy.
- Chocolate and peanut butter: A classic combination in every bite.
- Easy to make ahead: Prepare them before a party or special occasion.
- Perfect for holidays: Add them to Christmas candy trays, Valentine’s Day treats, or homemade gift boxes.
- Great for sharing: Their bite-sized shape makes them easy to serve at gatherings.
Recipe Overview
- Prep time: 25 minutes
- Chilling time: 45–60 minutes
- Total time: Approximately 1 hour 10 minutes to 1 hour 25 minutes
- Yield: About 24 truffles
- Category: Dessert
- Method: No-bake
Times and yield are estimates and depend on the size of the truffles and how quickly the chocolate sets.
Ingredients for Peanut Butter Cup Truffles
For the Peanut Butter Filling
- 1 cup creamy peanut butter
- ¼ cup unsalted butter, softened
- 1 teaspoon vanilla extract
- 2 cups powdered sugar
For the Chocolate Coating
- 2 cups semisweet chocolate chips
- 1 tablespoon coconut oil or vegetable shortening, optional
Optional Decorations
- Melted white chocolate for drizzling
- Crushed peanuts
- Chocolate sprinkles
Note: This is a suggested recipe created for this article, not a rewrite of an original recipe supplied by you. The optional coconut oil or shortening helps thin the chocolate for dipping.
How to Make Easy Peanut Butter Cup Truffles
Step 1: Prepare the Peanut Butter Mixture
Add the creamy peanut butter and softened butter to a large mixing bowl. Stir until the mixture is smooth and well combined.
Mix in the vanilla extract.
Step 2: Add the Powdered Sugar
Gradually add the powdered sugar, mixing after each addition. Continue until a thick dough forms.
The mixture should be firm enough to roll into balls without sticking excessively to your hands. If necessary, chill it briefly before shaping.
Step 3: Roll into Balls
Scoop small portions of the peanut butter mixture and roll them between your palms to form smooth balls.
Place the balls on a parchment-lined baking sheet. Aim for a consistent size so the truffles chill evenly and are easy to serve.
Step 4: Chill the Truffles
Place the baking sheet in the refrigerator for approximately 30–45 minutes, or until the peanut butter balls feel firm.
Chilling helps them hold their shape when dipped into warm chocolate.
Step 5: Melt the Chocolate
Place the semisweet chocolate chips in a microwave-safe bowl. Heat in 20–30-second intervals, stirring between each interval until smooth.
If desired, stir in the coconut oil or vegetable shortening to make the coating easier to dip.
Avoid overheating the chocolate, as it can become thick or grainy.
Step 6: Dip the Peanut Butter Balls
Use a fork or dipping tool to lower each chilled peanut butter ball into the melted chocolate. Turn it gently to coat all sides.
Lift the truffle out and allow excess chocolate to drip back into the bowl. Place it on the parchment-lined baking sheet.
Repeat with the remaining peanut butter balls.
Step 7: Add Decorations
If you’d like to decorate the truffles, sprinkle crushed peanuts or chocolate sprinkles over the coating before it sets.
For a pretty finish, drizzle the truffles with melted white chocolate after the chocolate coating has begun to firm up.
Step 8: Let the Chocolate Set
Return the truffles to the refrigerator for approximately 15–20 minutes, or until the chocolate coating is firm.
Once set, transfer them to a serving plate or an airtight container.
Step 9: Serve and Enjoy
Serve these chocolate peanut butter truffles chilled or allow them to sit briefly at room temperature for a softer bite.
Enjoy them with coffee, hot chocolate, or a glass of milk. They’re also delicious on holiday dessert trays alongside fudge, chocolate-covered pretzels, and homemade cookies.
Tips for the Best Chocolate Peanut Butter Truffles
Use creamy peanut butter. Conventional creamy peanut butter generally gives the filling a smooth, consistent texture. Natural peanut butter that separates may make the mixture too oily or soft.
Add powdered sugar gradually. This helps prevent a cloud of sugar and makes it easier to control the filling’s texture.
Chill before dipping. Firm peanut butter balls are less likely to break apart in the warm chocolate.
Melt chocolate slowly. Stir frequently and stop heating as soon as the chocolate is smooth.
Use a fork for dipping. A fork allows excess chocolate to drip away, helping create a neater coating.
Work in batches. Keep the remaining peanut butter balls refrigerated while you dip a few at a time.
Let the coating set completely. Give the truffles enough time to firm up before stacking or packaging them.
Easy Variations to Try
Dark Chocolate Peanut Butter Truffles
Use dark chocolate chips instead of semisweet chocolate for a richer coating that balances the sweet peanut butter filling.
White Chocolate Peanut Butter Truffles
Dip the truffles in melted white chocolate for a sweeter variation. Finish with a light drizzle of dark chocolate for contrast.
Crunchy Peanut Butter Truffles
Replace the creamy peanut butter with a suitable crunchy variety if you prefer extra texture. The consistency may vary, so adjust chilling as needed.
Holiday Peanut Butter Truffles
Decorate the chocolate coating with red and green sprinkles for Christmas, pastel decorations for Easter, or red and pink sprinkles for Valentine’s Day.
Peanut Butter Pretzel Truffles
Sprinkle finely crushed pretzels over the chocolate before it sets for a salty crunch that pairs well with the sweet filling.
How to Store Peanut Butter Cup Truffles
Because these truffles contain peanut butter and butter, store them in an airtight container in the refrigerator. They are best enjoyed within about 1–2 weeks for quality.
Place parchment paper between layers to help protect the chocolate coating.
For serving, remove only the amount you need and let the truffles soften slightly if you prefer a creamier center.
Can You Freeze Peanut Butter Cup Truffles?
Yes. Arrange the set truffles in a freezer-safe container, separating layers with parchment paper. Freeze for up to about 2–3 months for the best quality.
Thaw them in the refrigerator before serving. This gradual thawing helps reduce condensation on the chocolate coating.
Can You Make These Truffles Ahead of Time?
Absolutely! These no-bake treats are ideal for preparing ahead. Make them a day or two before a party, keep them refrigerated in an airtight container, and arrange them on a serving platter shortly before guests arrive.
Frequently Asked Questions
Why is my peanut butter filling too soft?
The filling may be too soft if the peanut butter is especially oily or the butter is too warm. Refrigerate the mixture briefly before rolling. Add a little more powdered sugar only if needed to achieve a workable consistency.
Why is the chocolate coating too thick?
Chocolate can become thick if it overheats or if moisture gets into the bowl. Heat it gently and stir often. A small amount of coconut oil or vegetable shortening can help thin the coating.
Can I use milk chocolate instead of semisweet chocolate?
Yes. Milk chocolate creates a sweeter coating. Since the filling is already sweet, semisweet or dark chocolate offers a more balanced flavor, but the choice is yours.
Do these truffles need to be refrigerated?
Refrigeration is recommended for this recipe because the filling contains butter. Keep the truffles in an airtight container in the refrigerator and avoid leaving them out for extended periods.
Can I make these without coconut oil?
Yes. The coconut oil or vegetable shortening is optional. You can melt the chocolate on its own, although the coating may be thicker and a little more difficult to work with.
Are peanut butter cup truffles good for Christmas gifts?
Yes! Place the fully set truffles in small paper candy cups and arrange them in a food-safe gift box. Keep them cool during storage and transport, and clearly label them as containing peanuts.
What to Serve with Peanut Butter Cup Truffles
These rich chocolate treats pair well with:
- Hot coffee or a homemade latte
- Hot chocolate topped with marshmallows
- Vanilla ice cream
- Fresh strawberries
- Chocolate chip cookies or brownies
- Other homemade no-bake candies
For a party, arrange them on a platter with a mixture of chocolate and vanilla desserts for a beautiful dessert table.
Final Thoughts
These Easy Peanut Butter Cup Truffles prove that a delicious homemade dessert doesn’t need to be complicated. With a creamy peanut butter center, a smooth chocolate coating, and no oven required, they’re a simple treat for everyday cravings and special occasions alike.
Make a batch for your next holiday gathering, package them as homemade gifts, or keep a few in the refrigerator whenever you want a little chocolate and peanut butter goodness.
Once you try this easy no-bake dessert, you may find yourself making it again and again!
Let’s talk! Do you prefer your peanut butter truffles coated in semisweet chocolate, dark chocolate, or white chocolate? Share your favorite in the comments!


