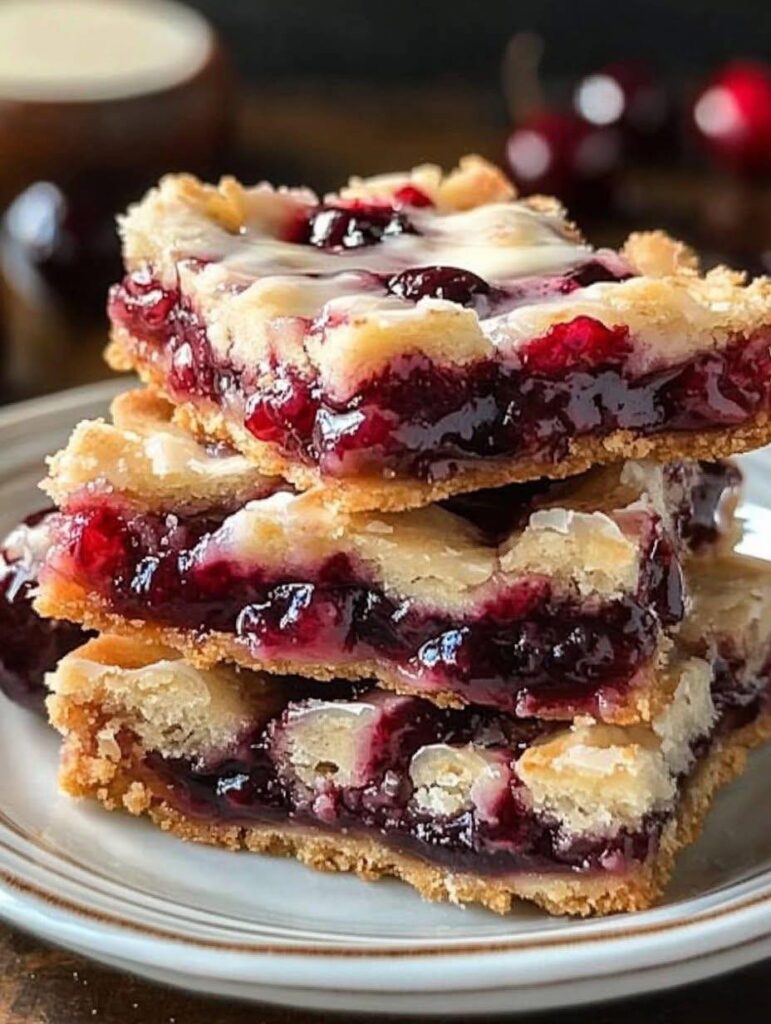
If you’re looking for a simple yet irresistible dessert that everyone will love, these cherry pie bars are the answer! Not only are they incredibly easy to make, but they’re also a hit at any party or gathering, especially during birthdays. Each bite is a perfect balance of sweet, tart cherries and a buttery, crumbly crust that will leave everyone asking for the recipe. The best part? You can whip these up every year for your birthday, just like a tradition, and they never fail to impress.
Let’s dive into the step-by-step method to make these mouthwatering cherry pie bars that will make any occasion feel even more special.
Ingredients You’ll Need:
To make these cherry pie bars, you’ll need the following ingredients:
1 can (21 ounces) of cherry pie filling
2 ½ cups all-purpose flour
1 ½ cups granulated sugar
1 teaspoon baking powder
¼ teaspoon salt
1 cup unsalted butter, softened
1 large egg
1 teaspoon vanilla extract
1 tablespoon lemon juice (optional, to brighten the flavor)
Powdered sugar for dusting (optional)
Equipment Needed:
• 9×13-inch baking pan
• Mixing bowls
• Electric mixer (optional, but it makes the process quicker)
• Rubber spatula or spoon
• Cooling rack (for cooling the bars)
Step-by-Step Method to Make Cherry Pie Bars:
1. Prepare the Oven and Pan: Start by preheating your oven to 350°F (175°C). While the oven is heating, grease a 9×13-inch baking pan with butter or line it with parchment paper for easy removal of the bars later. This ensures your bars don’t stick to the pan and makes clean-up easier.
2. Make the Crust and Topping Mixture: In a large mixing bowl, combine the flour, sugar, baking powder, and salt. Stir them together to evenly distribute the dry ingredients. Next, cut the softened butter into small pieces and add it to the bowl. Using an electric mixer or a pastry cutter, blend the butter into the dry ingredients until the mixture resembles coarse crumbs. This will form the base and topping for your bars.
Now, add the egg and vanilla extract to the mixture and continue mixing until it comes together into a dough-like consistency. This dough will be used for both the bottom crust and the crumbly topping.
3. Press the Dough into the Pan: Take about 2/3 of the dough and press it evenly into the bottom of the prepared 9×13-inch pan. Use your fingers or the back of a spoon to spread it out into a thin, even layer. This will serve as the base of your cherry pie bars.
4. Add the Cherry Pie Filling: Now it’s time for the star ingredient: the cherry pie filling. Open the can of cherry pie filling and give it a little stir. Spoon the filling evenly over the dough in the pan, spreading it out so it covers the entire surface. The sweet, syrupy cherries will create a luscious, juicy layer that contrasts perfectly with the buttery crust.
5. Add the Topping: Take the remaining dough and crumble it over the cherry filling. You want to create an even, crumbly layer of dough on top of the cherries. This will bake into a golden, slightly crispy topping that will give your bars a lovely texture.
6. Bake the Cherry Pie Bars: Place the pan in the preheated oven and bake for 35-40 minutes. The bars are done when the top is golden brown and the cherry filling is bubbling slightly around the edges. Keep an eye on them during the last few minutes to avoid over-baking.
7. Cool and Slice: Once baked, remove the pan from the oven and allow the cherry pie bars to cool completely in the pan. This will ensure the filling sets and makes it easier to slice into perfect bars. You can let them cool on the counter for about 30 minutes and then transfer them to the fridge to speed up the cooling process if needed.
Once they’re fully cooled, use a sharp knife to cut the bars into squares or rectangles, depending on your preference. You can make smaller or larger portions based on how many people you’re serving.
8. Optional – Dust with Powdered Sugar: For a touch of elegance and extra sweetness, dust the top of the cherry pie bars with powdered sugar before serving. This is optional but adds a beautiful finishing touch to these already visually appealing treats.
Serving and Enjoying Your Cherry Pie Bars:
These cherry pie bars are perfect for serving at any celebration, and they can be stored in an airtight container at room temperature for up to 3-4 days. If you have any leftovers, refrigerating them will help keep them fresh for a bit longer.
They are perfect for birthdays, family gatherings, picnics, or simply as an after-dinner dessert. Pair them with a scoop of vanilla ice cream or a dollop of whipped cream for an extra indulgent treat!
Why These Cherry Pie Bars are a Real Crowd-Pleaser:
• Quick and Easy: With just a few simple ingredients and a straightforward method, these bars are a breeze to make, even for novice bakers.
• Versatile: You can easily adapt this recipe with different fruit fillings, like blueberry or apple, to suit your preferences or what’s in season.
• Delicious and Addictive: The combination of a buttery, crumbly crust with the sweet and tart cherry filling is unbeatable. Every bite is packed with flavor, and it’s sure to satisfy any sweet tooth.
In conclusion, these cherry pie bars are a must-try for anyone looking for a fuss-free, yet utterly delicious dessert. Whether you make them for your birthday or as a treat for a crowd, they’re sure to become a favorite in your recipe collection. Enjoy the process, and most importantly, enjoy the taste of these heavenly bars!