2 cups graham cracker crumbs (about 16 full sheets)
½ cup (1 stick / 113g) unsalted butter, melted
2 tablespoons granulated sugar (optional, for a sweeter crust)
For the Dreamy Pineapple Filling:
1 (20 oz) can crushed pineapple in juice, UNDRAINED
1 (3.4 oz) box instant vanilla pudding mix (NOT cook-and-serve)
1 (8 oz) container frozen whipped topping (like Cool Whip), thawed
Optional Garnish:
Toasted coconut flakes or maraschino cherries
The Foolproof, Step-by-Step Method to No-Bake Bliss
Step 1: Create the Press-In Crust
In a medium bowl, combine the graham cracker crumbs, melted butter, and sugar (if using). Mix until it resembles wet sand and holds together when pinched.
Press this mixture firmly and evenly into the bottom of an ungreased 8×8 or 9×9 inch square baking dish. Use the bottom of a flat glass or measuring cup to get it perfectly compact and level. Place in the refrigerator to set while you make the filling.
Step 2: Whip Up the Magical Filling
In a large mixing bowl, pour in the entire can of crushed pineapple WITH its juice.
Sprinkle the entire box of instant vanilla pudding mix directly over the pineapple.
Immediately start whisking with a wire whisk. Whisk vigorously for 1-2 full minutes until the mixture is very thick and smooth. The acid in the pineapple will activate the pudding instantly.
Gently fold in the thawed whipped topping using a silicone spatula until no white streaks remain and the filling is uniformly creamy and pale yellow.
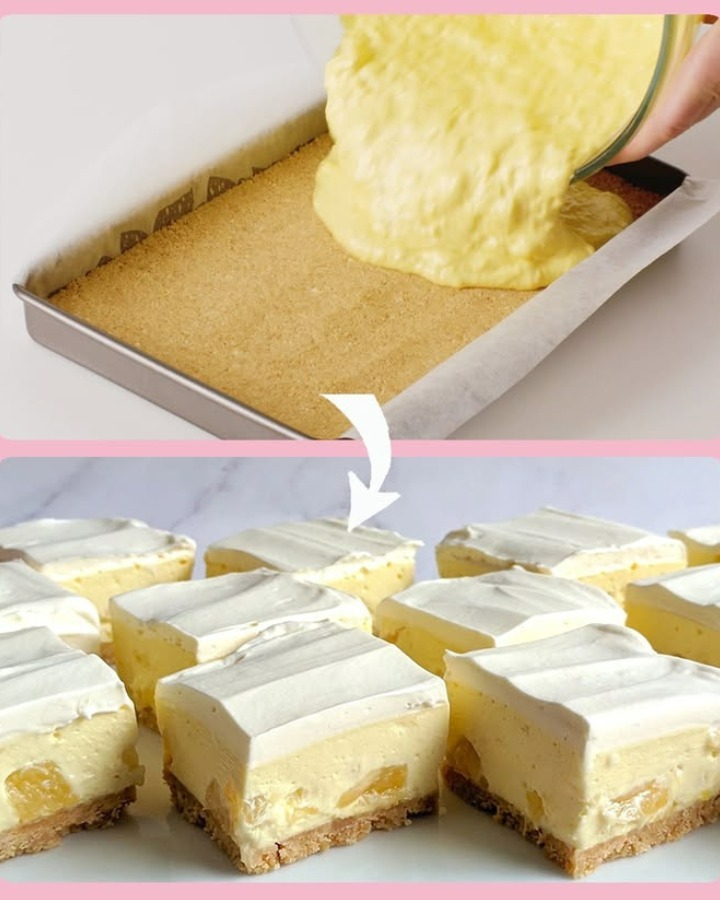
Step 3: Assemble & Let Magic Happen
Remove the crust from the fridge. Spread the pineapple filling evenly over the crust, smoothing the top.
Cover the dish with plastic wrap or a lid.
Chill in the refrigerator for at least 4 hours, or ideally overnight. This is crucial for the layers to set firmly and the flavors to meld.
Pro Chef Secrets for the Ultimate Squares
The Draining Debate: Do NOT drain the pineapple! The juice is essential for activating the pudding mix and creating the perfect set. Draining it will result in a dry, crumbly filling.
The Flavor Twist: Use instant cheesecake or coconut cream pudding mix instead of vanilla for a different flavor profile.
The Fresh Upgrade: Fold ½ cup of mini marshmallows or toasted pecans into the filling for extra texture.
The Crisp Crust Key: Press the crust in very firmly. A well-compacted crust won’t crumble when you cut the squares.
Serving, Storing & The Perfect Finish
Serve: Cut into neat squares straight from the fridge. For a beautiful finish, garnish each square with a sprinkle of toasted coconut or top with a maraschino cherry before serving.
The Perfect Pairing: These squares are sublime with a cup of coffee or tea. They’re the perfect light dessert after a heavy meal.
Storing: Keep covered in the refrigerator for up to 5 days. The crust will soften slightly over time but remain delicious.
Freezing: This dessert freezes very well! Freeze the whole pan or individual squares wrapped in plastic, then in an airtight container for up to 2 months. Thaw overnight in the fridge.
Conclusion: Your New Secret Weapon for Sweet Success
Easy Pineapple Squares prove that the most beloved desserts are often the simplest. They deliver incredible flavor and satisfaction with laughable effort, making you look like a kitchen wizard.
So, grab that can of pineapple and that box of pudding. Your path to becoming a no-bake legend—and bringing a little slice of sunshine to any day—is just a quick chill away.
We have to know—are you Team Toasted Coconut or Team Cherry on top? What’s your favorite no-bake dessert hack? Share your tips and twists in the comments below!